
How to Add Wireless Wi-Fi Network Manually in Windows 10
In today’s video, I’m going to show you how to manually add and connect to a wireless network on your Windows 10 computer. *To get started:* 1. Go into the Windows start bar, and type in “Control panel”, and click on the “Control panel” search result to open it up. 2. Once control panel opens up, make sure that you have the “Large icons” option selected for the “View by” option. 3. Once you’ve done that, click on the “Network and Sharing Center” tile. 4. Now from this page, click on the “Set up a new connection or network” hyperlink. 5. A “Set up a connection or network” dialog window will now open. From this screen, click on the “Manually connect to a wireless network” item from the list. 6. Now from this screen, you’ll want to type in your “Network name”, which in my instance is “ARRIS-0D09”, and then the security type of “WPA2-Personal”, which is the most common security type, and then finally, enter your security key. 7. Please note, your network name and security key can be found on the bottom of your router. 8. I’m now going to check the two boxes for “Start this connection automatically”, and “Connect even if the network is not broadcasting”. 9. Now click on the “Next” button. 10. You have now successfully connected to your wireless network. And it’s as easy as that, manually connecting to a wireless network in Windows 10 is a simple task to perform. #wifi #wirelessnetwork #internet #windows10
Suggested videos
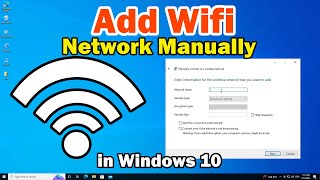
How to Add Wireless Wifi Network Manually in Windows 10 PC or Laptop
Discover You · 2:01
How to Remove Fake McAfee Virus Popup Notifications
Laurence Tindall · 2:24

How to Manually Add Wireless WiFi Network in Windows 10
Tech White · 2:39

How to Find Your Windows 10 Product Key
Laurence Tindall · 0:54
7 Ways to Fix a Computer That Can't Find or Connect to Wifi (Windows 10 Laptops & Desktops)
Ask A Computer Geek · 11:39

How To Add WiFi Network Manually In Windows 11 - Full Guide
GuideRealm · 1:34
How to Fix "We couldn’t update the system reserved partition" in Windows 11
Laurence Tindall · 2:16

How to Add Wireless Wi-Fi Network Manually in Windows 10 (2026 Step by Step Guide)
Claritics · 3:03
How To Fix High Memory/RAM Usage In Windows 10
Laurence Tindall · 2:48
[SOLVED] WiFi Not Showing in Settings On Windows 10 | Missing WiFi Fix
LifeOS Mastery · 7:21
How to Find All Installed Drivers On Your Computer
Laurence Tindall · 2:13
How to Fix WiFi Not Showing Up on Windows 10!! - Howtosolveit
Howtosolveit · 5:11