
How to Connect a Bluetooth Module (HC-05) to Arduino — Control an LED from Your Phone
# 🔵 Control an LED with Bluetooth HC-05 & Arduino UNO | 3D Animated Tutorial 🚀 Learn how to connect an **HC-05 Bluetooth module to an Arduino UNO** and control an LED wirelessly using your smartphone! In this beginner-friendly 3D animated tutorial, you’ll learn the complete circuit wiring, voltage divider connections, Arduino programming, Bluetooth pairing, and troubleshooting. 🎬 **VIDEO TIMESTAMPS** ⏱️ 0:00 – Introduction & Project Demo ⏱️ 0:09 – Components Required ⏱️ 0:26 – Understanding the HC-05 Module ⏱️ 0:41 – Complete Wiring Guide ⏱️ 1:42 – Arduino Code Explained ⏱️ 2:10 – Pair Your Phone & Test ⏱️ 2:36 – Troubleshooting & Outro 🛠️ **COMPONENTS REQUIRED** - Arduino UNO - HC-05 Bluetooth module - Half-size breadboard - 1 kΩ resistor - 2 kΩ resistor - LED - 220 Ω resistor - Jumper wires - Android smartphone with a compatible Bluetooth serial terminal app 🔌 **CIRCUIT WIRING** 1. Arduino 5V → HC-05 VCC 2. Arduino GND → HC-05 GND 3. HC-05 TXD → Arduino D2 4. Arduino D3 → 1 kΩ resistor → HC-05 RXD 5. HC-05 RXD → 2 kΩ resistor → GND 6. Arduino D8 → 220 Ω resistor → LED positive (+) 7. LED negative (−) → GND ⚠️ **Important:** The HC-05 RXD pin typically requires 3.3V logic. Use the voltage divider to reduce the Arduino's 5V TX signal. Verify your module's pin labels and specifications before connecting it. 💻 **ARDUINO CODE — BLUETOOTH LED CONTROL** Copy this code into the Arduino IDE and upload it to your Arduino UNO. ```cpp #include SoftwareSerial.h SoftwareSerial bt(2, 3); // RX, TX const int LED_PIN = 8; void setup() { pinMode(LED_PIN, OUTPUT); bt.begin(9600); } void loop() { if (bt.available()) { char c = bt.read(); if (c == '1') { digitalWrite(LED_PIN, HIGH); bt.println("LED ON"); } else if (c == '0') { digitalWrite(LED_PIN, LOW); bt.println("LED OFF"); } } } ``` 📱 **HOW TO TEST THE PROJECT** 1. Upload the code to your Arduino UNO. 2. Power the Arduino and HC-05 module. 3. Open your phone's Bluetooth settings and pair with HC-05. 4. If prompted, try PIN `0000` or `1234`, depending on the module. 5. Open a compatible Bluetooth serial terminal app and connect to HC-05. 6. Set the serial communication to 9600 baud if the app provides that option. 7. Send `1` to turn the LED ON. 8. Send `0` to turn the LED OFF. The Arduino will send `LED ON` or `LED OFF` as a confirmation message. 🔧 **TROUBLESHOOTING** ✅ Check that TX connects to RX and RX connects to TX. ✅ Confirm the HC-05 baud rate is 9600. ✅ Verify the voltage divider connections. ✅ Check the LED polarity and resistor wiring. ✅ Make sure the phone app connects using Bluetooth Classic serial communication. 📌 **Compatibility note:** Standard HC-05 modules generally work with Android phones. iPhones typically cannot connect to them using ordinary Bluetooth serial terminal apps because of Bluetooth Classic SPP limitations. 🎯 **WHAT YOU WILL LEARN** - Arduino UNO programming - HC-05 Bluetooth communication - UART serial communication - Voltage divider circuits - Wireless LED control - Beginner electronics and IoT projects 📺 **ABOUT SENSORSTACK-EASY** Welcome to **SensorStack-Easy**, where we make Arduino, sensors, electronics, robotics, embedded systems, IoT, and AI technology easy to understand through practical projects and engaging 3D animated tutorials. 👍 Like this video if it helped you! 💬 Comment your questions below. 🔔 Subscribe to SensorStack-Easy for more exciting electronics projects. #Arduino #HC05 #ArduinoUNO #BluetoothArduino #ArduinoProjects #LEDControl #Electronics #IoT #Robotics #SensorStackEasy
Suggested videos

how to connect hc 05 bluetooth module to Arduino uno and other [CC]
DPV TECHNOLOGY · 7:09
Arduino HX711 Load Cell Tutorial: Wiring, Code & Calibration
SensorStack-easy · 6:35
Arduino Bluetooth Basics
Tinkernut Labs · 3:58
The Sensor Stack for Physical AI
kb9ttx · 9:06
Cheap Bluetooth audio receivers explained: pros, cons, how to use
LeftyMaker · 10:40
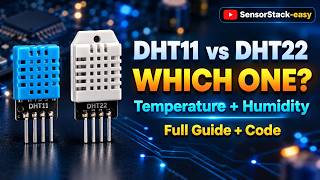
DHT11 vs DHT22: Which Humidity Sensor Should You Use? (Arduino Wiring + Code) Full Guide
SensorStack-easy · 5:47

Bluetooth module bought off Ebay from China! Install and review, how well does it work?
High Priority · 9:59

Sound Sensor Explained – Wiring, Peak-to-Peak Code & Clap Switch (Arduino)
SensorStack-easy · 4:24

HC-05 Bluetooth Module with Arduino-MIT App Inventor
BINARYUPDATES · 27:57
How does the IKEA Alpstuga Air Quality Sensor Stack up to more expensive options?
Simon Says Home Assistant · 9:43
How to install Bluetooth MP3 Player Decoder Board 12V? USB/TF
New Tec Pro · 4:42
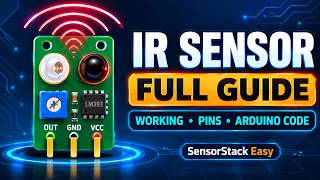
IR Sensor Explained: Working, Pins, Specs, Arduino Code Alternatives
SensorStack-easy · 5:50